Hands-on tools · The mastering course
Mastering the Turntables
Eleven lessons, from loading one song to mixing a full set, with beatmatching by ear and real scratches.
How to use this course
Eleven lessons take you from loading one song to mixing a full set, with beatmatching by ear and real scratches. Do them in order, with the Turntables page open beside this doc.
You need:
- Headphones or real speakers. Beatmatching is done by ear, and a laptop speaker can't play the kick drums you're matching.
- Two songs with a steady drum beat, as MP3, M4A or WAV files on the computer (Lesson 2 says where to get them legally). Songs within about 10 BPM of each other are easiest to start with.
- One beat from the Drum Bench (optional but useful): it has a perfectly steady tempo, which makes it the best practice partner.
Every lesson has three parts, like the Drum Bench course:
- Learn: what the control does and why DJs use it.
- Do it now: an exercise on the real decks.
- Check yourself: a test you pass by ear. Don't move on until you can.
Counting: DJs count in beats and bars. Four beats make a bar; 8 bars (32 beats) make a phrase, the building block of almost every dance, pop and hip-hop song. Lessons 6 and 10 are built around that.
Lesson 1 — A tour of the two decks and the mixer
There are two identical decks, A and B, side by side, and a mixer strip under them. Learn one deck and you know both.
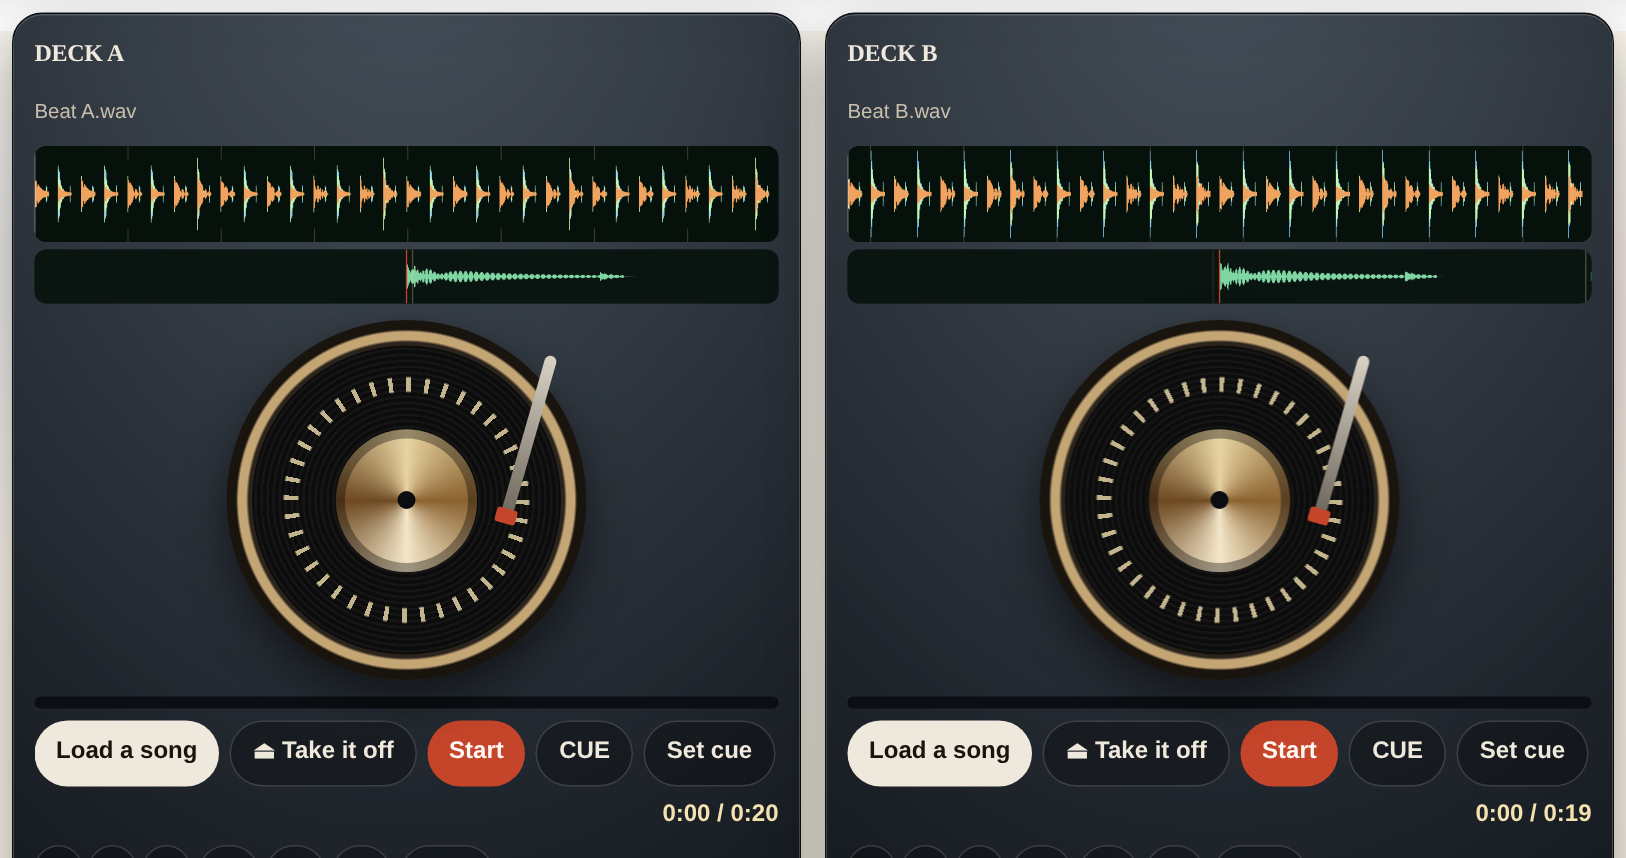
On each deck, top to bottom
| Part | What it's for |
|---|---|
| The waveform | The whole song. Orange is bass (kicks), green is mids, blue is highs. Click or drag anywhere on it to move the needle there. |
| The close-up strip | A zoomed view of where the needle is right now. Also clickable. |
| The record (platter) | Grab and drag it to scratch; hold it still and the sound stops, like real vinyl. |
| Load a song · ⏏ Take it off · Start · CUE · Set cue | Getting music on and off, playing, and cueing (Lessons 2–3). |
| Hot cues 1 2 3 · Loops 1b 2b 4b · SYNC · BPM | Jump points, loops, and tempo (Lessons 3–5). The yellow number is the song's tempo. |
| KEY · SLIP · REV · TAP · ½× · 2× | Performance tools and tempo fixes (Lessons 5 and 9). |
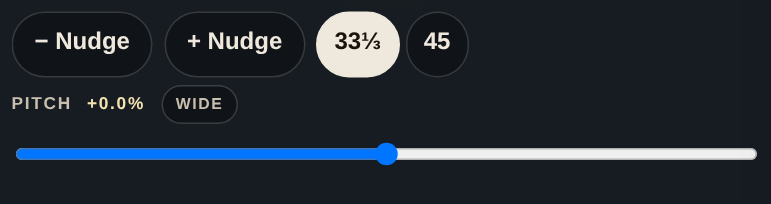
| − Nudge · + Nudge · 33⅓ · 45 | Beat alignment and record speed (Lessons 5– 6). |
| Pitch (with WIDE) | Fine speed control, the heart of beatmatching. |
| Filter · Echo | Sweep effects (Lesson 10). |
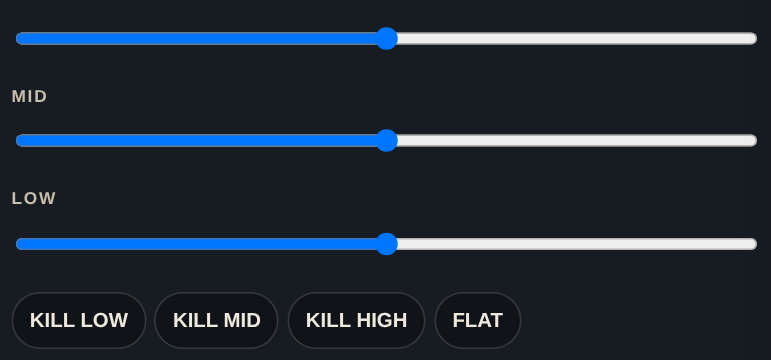
| High · Mid · Low · KILL LOW/MID/HIGH · FLAT | The deck's EQ (Lesson 8). |
| Volume | This deck's level. |
Under the decks (the mixer)
| Part | What it's for |
|---|---|
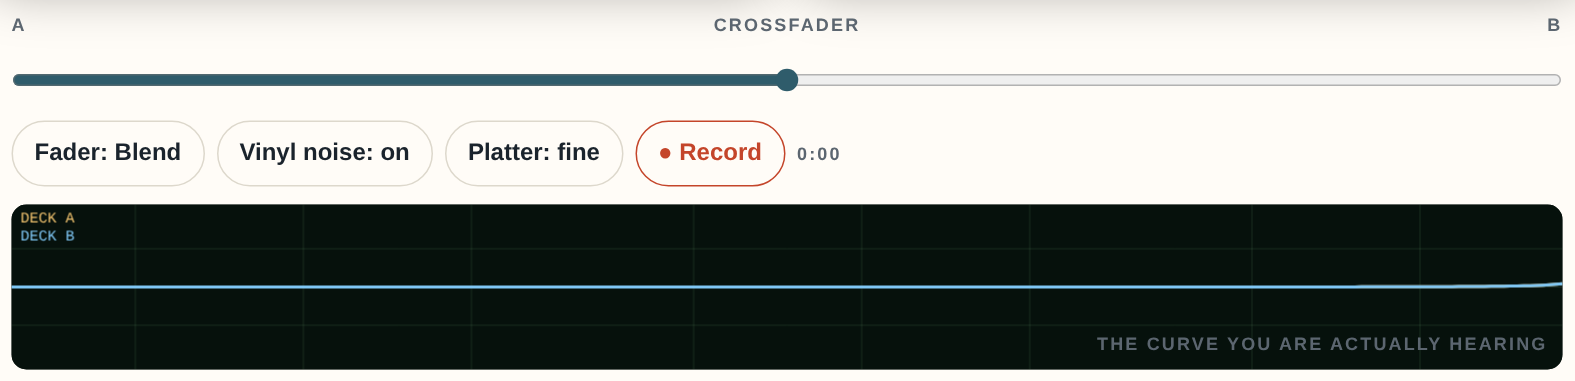
| Crossfader | Slides the sound from deck A (left) to deck B (right). |
| Fader: Blend / Cut | How the crossfader behaves: a slow blend for mixing, an instant cut for scratching (Lesson 7). |
| Vinyl noise: on/off | Adds record crackle. |
| Platter: fine / normal / 1:1 vinyl | How far the music moves when you move the record (Lesson 9). |
| ● Record | Records what both decks play, as a .wav take (Lesson 10). |
| The curve screen | Shows each deck's EQ and filter as a coloured line: gold for A, blue for B. |
| From the drum bench | Beats sent from the Drum Bench arrive here (Lesson 11). |
One thing this setup doesn't have: a headphone cue. Club mixers let you hear the next song in headphones before the crowd does. Here, both decks play through the same speakers, so you prepare the next song with the waveform, the BPM number and the crossfader. Lesson 6 shows how.
Do it now: load any song on deck A. Click three different places on its waveform, then press Start and watch the close-up strip scroll.
Check yourself: point to the orange marks on the waveform, and say where the song's first big drop or chorus probably is from the shape alone.
Lesson 2 — Getting music on
A song is a file on this computer. The page reads it in the browser and never uploads it anywhere.
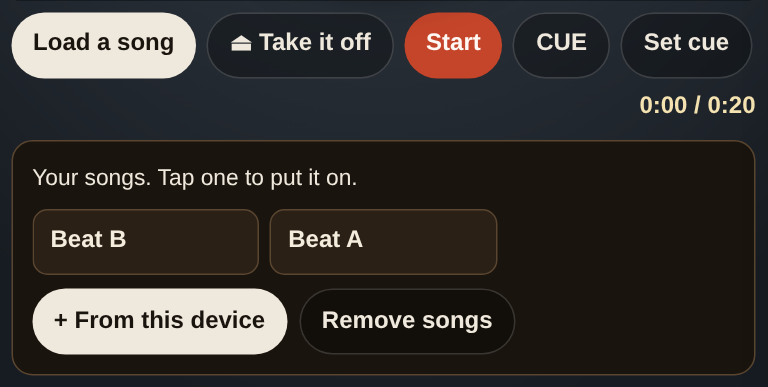
Three ways to load a deck
- Press Load a song and pick a file. MP3, M4A, WAV and AAC work everywhere.
- Drag a song file from a folder straight onto a deck.
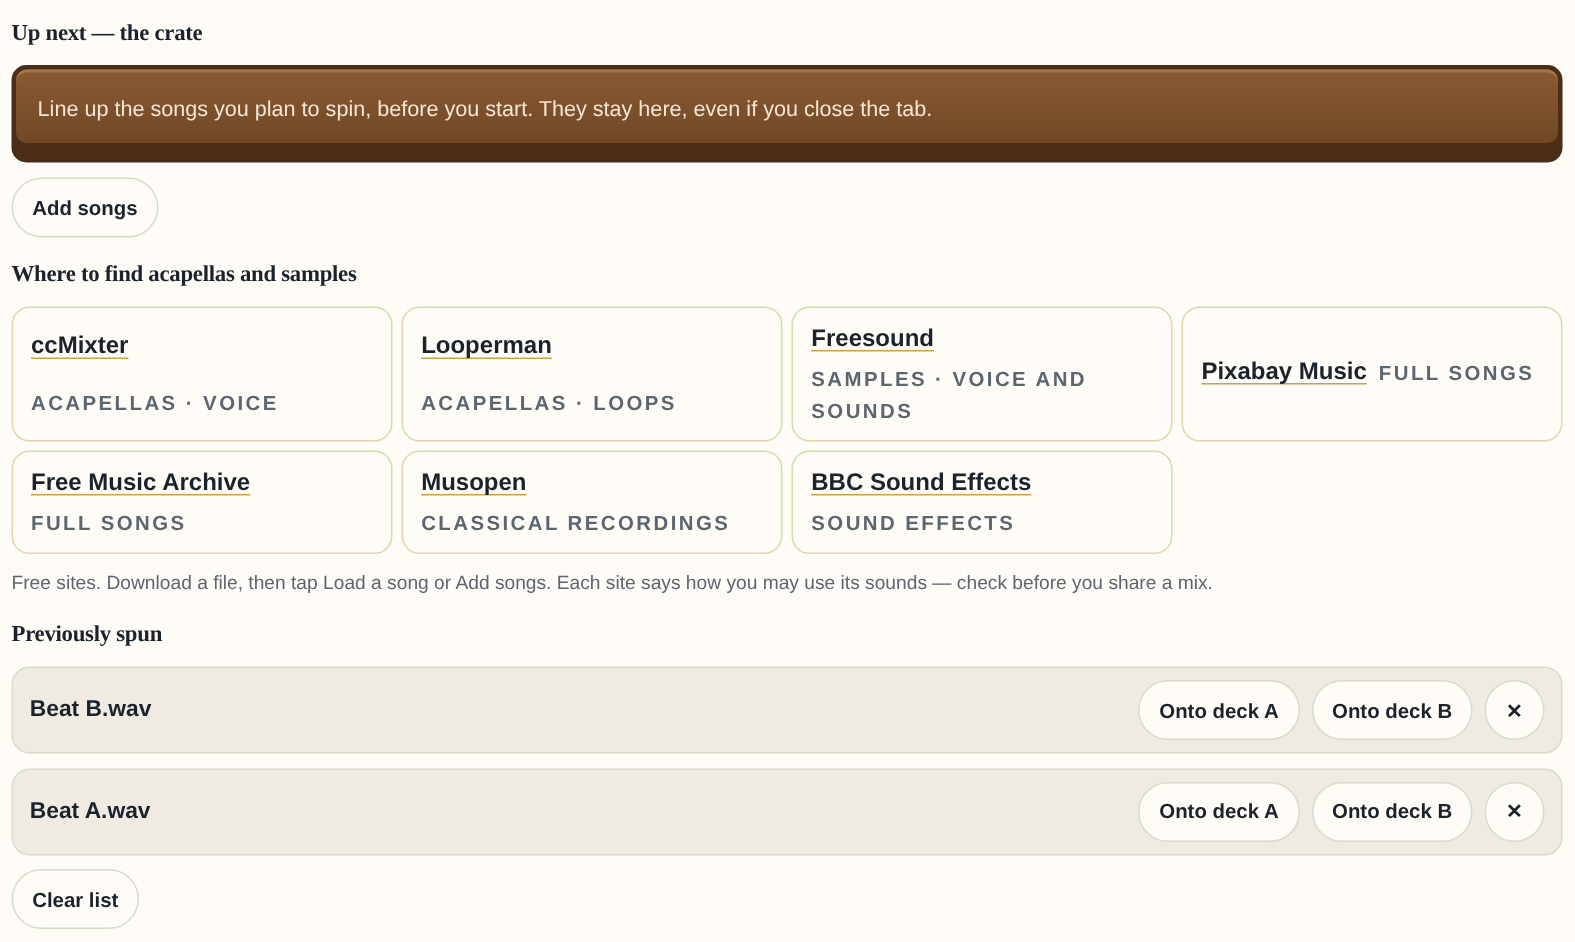
- Press Onto deck A or Onto deck B on a Drum Bench beat or on one of your own recorded takes.
While the deck works out the tempo, the BPM spot says listening…. If the song has no steady drum beat, it says no steady beat; that song is fine to play but can't be synced (Lesson 5). ⏏ Take it off clears the deck.
The deck remembers each song. The tempo, the beat grid and your hot cues are saved for the last 40 songs you've loaded, so they're waiting the next time you load the same file.
Where to get music legally
| Source | What it's good for |
|---|---|
| Your own Drum Bench beats | Perfectly steady practice partners (Lesson 11) |
| YouTube Audio Library | Free, downloadable tracks cleared for use |
| ccMixter | Free remixable tracks, and a cappellas (vocals only) that are great for scratching |
| Free Music Archive, Internet Archive | Large free collections; check each track's licence |
| Songs you've bought as DRM-free files, or your own CDs | Anything you legally own as a file |
Downloads inside streaming apps (Spotify, Apple Music, YouTube Music) are locked copies, not files, so they can't be loaded, and ripping them breaks those services' rules.
Picking practice songs: choose two songs with a clear kick drum, within about 10 BPM of each other (for example 95 and 100). Avoid songs with live, drifting tempos to start with.
Do it now: load one song on deck A and a different one on deck B. Write down both BPM numbers.
Check yourself: tap your foot to deck A. Does the yellow BPM number feel right? If it's twice as fast or half as fast as your foot, fix it with ½× or 2× (Lesson 5).
Lesson 3 — Start, CUE, Set cue and hot cues
A cue point is a bookmark on the exact spot you want a song to start. Good DJs cue on the first beat of a bar, almost always a kick drum.
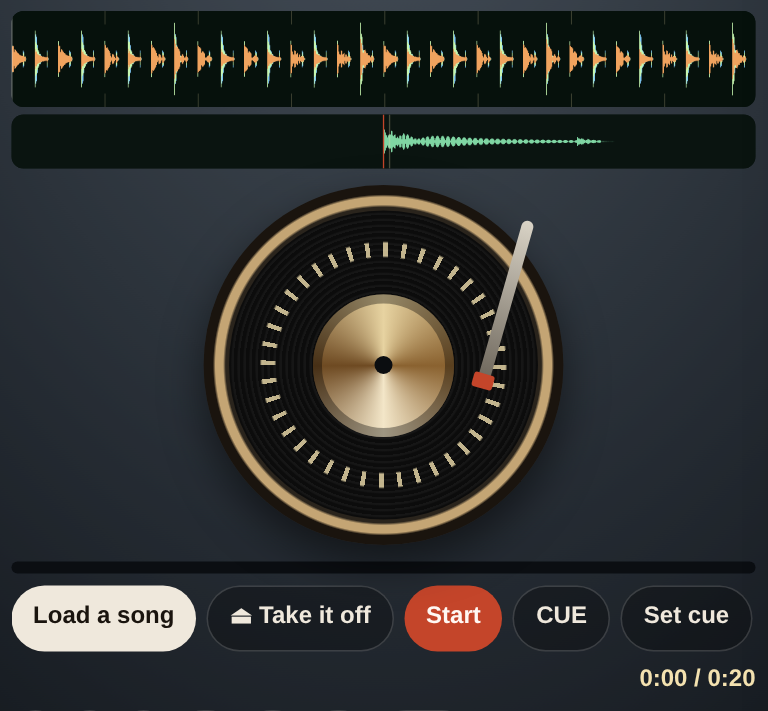
| Button | What it does |
|---|---|
| Start | Starts the record turning, or stops it. |
| Set cue | Puts the cue point where the needle is now. Before you set one, the cue is the very start of the song. |
| CUE | Hold it down: the song plays from the cue point. Let go: it jumps back to the cue point and stops, ready. |
| Hot cue 1, 2, 3 | An empty one saves the spot you're on (it lights up). A lit one jumps there instantly, even while playing. Hold it for about a second (or Alt-click it) to clear it. |
Finding the first kick exactly
- Click the waveform just before the first orange mark (the first kick).
- Put your hand on the record and turn it slowly forward until you hear the kick begin.
- Back it up a tiny amount so the needle sits just before the hit.
- Press Set cue.
- Press and release CUE a few times. You should hear a clean "boom" each time, with nothing before it.
Hot cue ideas: 1 = the first beat, 2 = where the vocal starts, 3 = the drop or chorus. Tapping a hot cue on the beat makes an instant remix; tapping CUE quickly in rhythm makes the classic stutter start.
Do it now: set a perfect cue on the first kick of both songs. Then set hot cues 1, 2 and 3 on deck A at three musical moments.
Check yourself: with deck A stopped on its cue, press Start exactly on a beat you count out loud ("1, 2, 3, 4, go"). The song's first kick should land on your "go".
Lesson 4 — Loops
A loop repeats a piece of the song forever until you let it go. It's the DJ's way to make an intro longer, hold a great drum break, or build tension.
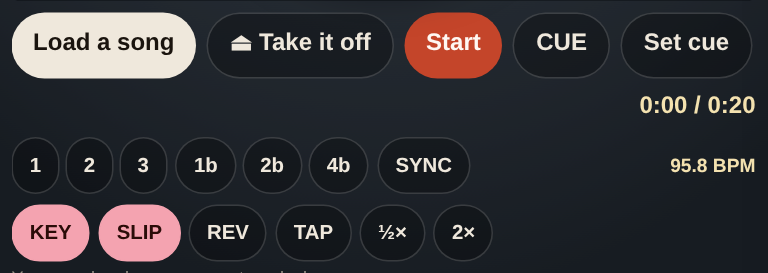
| Button | Loop length |
|---|---|
| 1b | 1 bar (4 beats) |
| 2b | 2 bars (8 beats) |
| 4b | 4 bars (16 beats) |
Pressing a loop button starts the loop on the nearest beat to the needle, using the tempo the deck measured, so it stays in time. The lit button shows the loop that's running. Press the same button again to let go; the song carries on from there. Loops need a BPM, so they don't work on a song showing "no steady beat".
Three classic uses
- Stretch an intro. Loop the drums-only intro of the incoming song for 4 bars while you finish the mix (Lesson 10).
- Hold a break. When a song hits a great drum section, loop it and scratch or mix over the top.
- The build-up. Press 4b, then after 4 bars press 2b, then 1b. The loop gets shorter and tighter, and the crowd feels something coming. Let go on the next bar's first beat for the drop.
Do it now: start deck A. On the first beat of a bar, press 4b. Count the four bars out loud as it loops, then press 4b again to release it. Then try the 4b → 2b → 1b build-up.
Check yourself: a clean loop has no hiccup where it jumps back. If you hear a skip or a doubled kick, the BPM is probably wrong: fix it with TAP, ½× or 2× (Lesson 5) and try again.
Lesson 5 — Tempo: BPM, PITCH, WIDE, 33/45 and SYNC
Two songs mix cleanly only when they play at the same tempo. The yellow BPM number on each deck is the tempo it's playing at right now, including any pitch change, so your job is simple to state: make the two numbers match.
| Control | What it does |
|---|---|
| PITCH | Speeds the record up or slows it down by ±8%, in half-percent steps. The readout shows the change, e.g. +3.5%. |
| WIDE | Opens PITCH to ±50% for big jumps. Turn it off and PITCH goes back to ±8%. |
| 33⅓ / 45 | Record speed. 45 plays 35% faster (and higher), like a real turntable. |
| KEY | Key lock: PITCH changes the speed without changing how high or low the voice sounds. Scratching still bends the pitch. KEY starts switched on. |
| TAP | Tap it 3 to 5 times on the beat to replace the deck's tempo guess with yours. Tap on real beats: it also lines the beat grid up with where you tapped. |
| ½× / 2× | Fixes a tempo read at half or double speed (a 90 BPM song shown as 180, for example). |
| SYNC | Matches this deck's tempo to the other deck's and jumps to the nearest beat. It stays locked, adjusting a hair at a time so the beats don't drift. Press again to unlock. |
The math. Pitch percent = (target BPM ÷ song BPM − 1) × 100. To play a 100 BPM song with a 106.8 BPM song, deck B needs +6.8%. SYNC does this sum for you and turns on WIDE if more than 8% is needed. It also counts half and double time, so 70 and 140 BPM songs can sync.
About SYNC. It's a real tool and working DJs use it. But learn to beatmatch by ear first (Lesson 6). A mix synced by a button still needs your ears for phrasing, EQ and the crossfader, and SYNC can't help with a song that has no steady beat.
Do it now
- Load your two practice songs. Note both BPMs.
- Work out the pitch deck B needs with the formula, and set it with PITCH until the two numbers match.
- With KEY lit (it starts on), move deck B's PITCH to +8% and back. Then turn KEY off and do it again. Hear the difference in the voice.
- Press SYNC on deck B and check it arrives at the same pitch you worked out.
Check yourself: given a 94 BPM song and a 100 BPM song, say which deck to change and by how much, without the machine. (Answer: the 94 up by about 6.4%, or the 100 down by 6%.)
Lesson 6 — Beatmatching by ear
Beatmatching means getting two songs' kick drums to land at exactly the same moment and stay there. It's the core DJ skill, and it takes a few weeks of practice to feel easy.
Two things have to match:
- Speed (tempo): both BPM numbers the same. You fix it with PITCH (Lesson 5).
- Position (phase): the kicks landing together. You fix it with Nudge, or with your hand on the record.
Nudge speeds the record up (+ Nudge) or slows it down (− Nudge) by 4% only while you hold it. Let go and it goes back to its set speed. Short taps make small moves.
Hearing it without headphones. This setup plays both decks through the same speakers, so you listen to both at once:
- Deck A playing, crossfader hard left.
- Deck B cued on its first kick, PITCH set so the BPM numbers match.
- Count A's bars out loud. On A's "1", press Start on deck B.
- Move the crossfader a little toward the middle so B is quiet but audible under A.
- Listen to the kicks. One clean thump means they're matched. "Ga-dump, ga-dump" (like a galloping horse) means they aren't.
- Watch the two close-up strips. If B's orange marks come after A's, B is behind: tap + Nudge. If they come before, B is ahead: tap − Nudge.
- If B keeps drifting the same way after you've nudged it into place, the speed is slightly off: move B's PITCH a hair (half a percent) in the direction you kept nudging.
By hand, like vinyl DJs: instead of Nudge, rest a finger on deck B's record and push it slightly forward or drag it back. It takes more practice but it's faster once you have it.
Counting phrases. Songs are built in phrases of 8 bars (32 beats). Start deck B on the first beat of one of A's phrases, not in the middle, or the two songs' changes will clash. Count "1, 2, 3, 4" for beats and keep a finger count of bars.
Do it now: practise with a Drum Bench beat on deck A (perfectly steady) and a song on deck B. Match by ear, never touching SYNC. Do it five times in a row.
Check yourself: get the two decks matched and let them play for 32 beats (8 bars) without touching anything. No gallop means you've matched both the speed and the position.
Lesson 7 — The crossfader: Blend and Cut
The crossfader decides how much of each deck you hear: hard left is only A, hard right is only B, the middle is both. The Fader button under the decks switches how it gets there.
| Setting | How it behaves | Use it for |
|---|---|---|
| Fader: Blend | A smooth fade. At the middle, both decks play at about 70% so the total loudness doesn't dip. | Mixing one song into another |
| Fader: Cut | Opens almost instantly: a hair away from the edge, the deck is nearly at full volume. | Scratching (Lesson 9) and quick cuts between songs |
Two ways to mix
- Crossfader mix: both deck Volume sliders up, and you slide the crossfader from A to B over 8 to 16 bars. Simple and smooth.
- Volume mix: crossfader in the middle, and you bring deck B's Volume up while you bring deck A's down. It gives more control, and it's how most club DJs mix.
The cut. With Fader: Cut, flick the crossfader from A to B exactly on a "1". It's an instant switch, great for hip-hop, where songs often change on a hard cut rather than a long blend.
Do it now
- With your two matched songs (Lesson 6), set Fader: Blend and slide from A to B over exactly 16 beats, counting out loud.
- Do the same mix again using only the two Volume sliders, crossfader in the middle.
- Switch to Fader: Cut and practise flicking from A to B on the "1" of a bar.
Check yourself: during a Blend mix, the overall loudness should stay steady, with no dip or bump in the middle. On a cut, the new song should come in exactly on its first beat.
Lesson 8 — EQ and the KILL buttons: the bass swap
Two basslines playing at once sound muddy and messy, even when the beats are matched perfectly. The EQ lets you run two songs together while only one of them carries the bass.
| Control | Range | What it does |
|---|---|---|
| High | ±26 dB | Hats, cymbals, the sparkle on a voice |
| Mid | ±26 dB | Vocals, snares, most instruments |
| Low | ±26 dB | Kick drum and bassline |
| KILL LOW / MID / HIGH | on or off | Removes that band completely while lit. Press again to bring it back. |
| FLAT | — | Resets that deck's EQ, its kills and its Filter to normal |
The curve screen draws each deck's EQ as a line (gold for A, blue for B), so you can see what you've done.
The bass swap: the most useful mix in DJing
| When | Deck A (outgoing) | Deck B (incoming) |
|---|---|---|
| Before the mix | Playing, full EQ | Cued, beatmatched, KILL LOW on |
| Beat 1 of a phrase | Still full | Bring it in with the crossfader or Volume |
| Beats 1–16 | Full | Mids and highs only, adding the new song's feel |
| Beat 17 (half-way) | KILL LOW on | KILL LOW off at the same moment |
| Beats 17–32 | Losing its bass; fade it out | Now carrying the bass |
| Beat 1 of the next phrase | Gone | The new song, full |
The two kill buttons must switch on the same beat. Practise pressing both at once, one finger each.
Other EQ moves
- Clean vocal over a beat: KILL MID on the beat song so a singer on the other deck sits clearly.
- Tease: KILL LOW and KILL HIGH on the incoming song so only its mids leak in, then open them one at a time.
Do it now: do the bass swap on your two practice songs, counting 32 beats out loud, swapping on 17.
Check yourself: during beats 1–16, you should hear only one kick and one bassline. At the swap, the bass should change hands with no gap and no doubled boom.
Lesson 9 — Scratching
A scratch is two hands doing two different jobs: one moves the record, the other opens and closes the crossfader. Learn each hand alone before putting them together.
How the record behaves. Grab the platter and the music follows your hand: forward, back, fast or slow. Hold it still and the sound stops, just like vinyl. Let go and the motor pulls it back up to speed.
Platter setting (button under the decks, click to change):
| Setting | Feel | Who it's for |
|---|---|---|
| fine (starts here) | Your hand moves a long way, the music moves a little | Learning; easiest to control |
| normal | In between | Once your hand is steady |
| 1:1 vinyl | Like a real record: half a turn is about 0.9 seconds of music | Advanced; a small move makes a big sound |
Set up for scratching: Fader: Cut, the sound on deck B, deck A stopped or playing a beat. Pick a short sound: one word or "ahh" from an a cappella is ideal. Cue it exactly on the start of the sound (Lesson 3).
Four scratches, easiest first
| Scratch | Record hand | Fader hand |
|---|---|---|
| Baby | Push forward, pull back, in rhythm | Leave it open the whole time |
| Forward | Push forward | Open on the push, closed (cut) on the pull back |
| Chirp | Push forward, pull back | Open as you start the push, close just as the push ends, open again as you start the pull |
| Transform | Push forward slowly | Tap the fader open and shut quickly in rhythm while the record moves |
Practise each scratch on beats: one move per beat, then two, then four.
SLIP and REV. SLIP starts switched on. With it on, the song keeps playing silently underneath while you scratch; let go and it carries on exactly where it would have been, still in time. Turn SLIP off when you want the record to stay where your hand leaves it. Hold REV to play backwards; with SLIP on, letting go puts you straight back on the beat. That's the classic "rewind" drop.
Do it now: on fine, do 16 baby scratches in time with a Drum Bench beat. Then 16 forwards. Try chirps only when both feel smooth.
Check yourself: do forwards over a beat for 8 bars. You should hear only the forward sound, never the backward one: if you hear the pull back, your fader hand is late.
Lesson 10 — Mixing a set
A set is a few songs joined so the music never stops and the energy goes where you want it. Everything from Lessons 3 to 8 comes together here.
Mix outro into intro. Most dance and hip-hop songs start and end with 16 or 32 beats of mostly drums. Mix the end of the outgoing song over the start of the incoming one, phrase to phrase. Use the waveform: the thin, drums-only start and end are easy to spot.
The full 32-beat mix
- Cue deck B on its first kick. Match its BPM to deck A (Lesson 5 or 6).
- Put KILL LOW on deck B.
- On beat 1 of one of A's phrases, start B and bring it in over 8 beats.
- On beat 17, swap the bass (Lesson 8).
- Over beats 17 to 32, fade A out. If A's outro is too short, loop it (Lesson 4).
- Take A's EQ to FLAT and load the next song.
Effects for transitions
| Effect | How it works | Transition move |
|---|---|---|
| Filter | Left of centre muffles the song (low- pass); right thins it out (high-pass). Centre is off. | Sweep the outgoing song slowly right over 8 bars as the new one comes in. |
| Echo | Repeats the sound on a dotted-eighth note timed to the song's BPM. | "Echo out": raise Echo on the last beat, then cut the deck. The echoes ring on in time. |
Planning energy. Order songs so the tempo and intensity climb, peak, then settle. Moves of 2–6 BPM between songs feel smooth. For a big jump, use a hard cut (Lesson 7) or an echo out instead of a long blend.
Record your set. Press ● Record under the decks. It records what both decks play (never a microphone), up to 10 minutes. Press ■ Stop recording and the take appears in the Takes list, where you can play it back, Save as .wav, or put it onto a deck.
Do it now: plan a 4-song set on paper (song, BPM, the phrase you'll mix on), then record the whole thing in one take.
Check yourself: listen back. Every mix should be phrase to phrase with one bassline at a time, and no gap or clash anywhere.
Lesson 11 — The Drum Bench and the decks together
The two machines are built to feed each other: beats go from the Drum Bench to the decks, and your recorded takes can go back into the Drum Bench as samples.
Bench to decks. On the Drum Bench, press TO THE DECKS. On the Turntables page, the
From the drum bench strip shows the beat with Onto deck A and Onto deck B. It's about 20 seconds long, so loop it (Lesson 4) to keep it going.
Five things to do with it
- The perfect practice partner. A Drum Bench beat never drifts, so it's the best way to learn beatmatching (Lesson 6).
- Your own beat under a song. TAP the song's tempo into the Drum Bench (its TAP key), program a beat at that tempo, send it, and mix it in under the song with the bass swap.
- Scratch over your own beat. Beat on deck A, a cappella on deck B, Fader: Cut (Lesson 9).
- Stems. SOLO the hats on the Drum Bench before sending: only the hats arrive. Layer them over a song that needs more energy.
- Resampling. Record a scratch or a short mix on the decks, Save as .wav, then load it onto a Drum Bench pad with SAMPLE (the first 2.5 seconds). That's how SP-1200 producers built new sounds from old records.
Do it now: make a 90 BPM beat on the Drum Bench, send it to deck A, and loop it. Put an a cappella or a song at about 90 BPM on deck B, beatmatch it, and record 2 minutes.
Check yourself: SAMPLE one of your own recorded scratches onto Drum Bench bank C, pad 1, and program it into a beat.
Practice plan and the mastery checklist
Twenty to thirty minutes a day for four weeks. Beatmatching is the slowest skill, so it appears every week.
| Week | Daily practice |
|---|---|
| 1 | Lessons 1–5, one a day. Then 10 minutes of cueing on the first kick (Lesson 3). |
| 2 | Lesson 6 every day: beatmatch a Drum Bench beat against a song by ear, 5 times. Add Lesson 7 by the end of the week. |
| 3 | Lessons 8 and 9. Warm up with 5 minutes of baby and forward scratches before every session. |
| 4 | Lessons 10 and 11. Record one 4-song set a day and listen back. |
Daily warm-up (5 minutes): one clean cue, one match by ear with no SYNC, 16 forward scratches in time.
Mastery checklist
- Name every control on a deck and on the mixer
- Cue any song exactly on its first kick
- Set, use and clear hot cues
- Loop a bar in time and do the 4-2-1 build-up
- Work out the pitch needed between two BPMs in your head
- Beatmatch two songs by ear, with no SYNC, in under a minute
- Hold a match for 32 beats with no gallop
- Blend with the crossfader and with the Volume sliders
- Do a clean bass swap on beat 17
- Do baby, forward, chirp and transform scratches in time
- Use SLIP and REV for a rewind that lands on the beat
- Record a 4-song set, phrase to phrase, with no clashes
- Send a Drum Bench beat to the decks and mix a song over it
When something goes wrong
| What you see or hear | Why | Fix |
|---|---|---|
| "This browser could not read…" | The file type isn't supported, or it's a locked streaming download | Use an MP3, M4A, WAV or AAC file |
| BPM says "no steady beat" | The song has no clear, steady drum | It still plays, but SYNC and loops won't work; pick another song to practise with |
| BPM is twice or half what you feel | The tempo was read at double or half time | Press ½× or 2×, or TAP it in |
| Loops skip or double a kick | The BPM or beat grid is slightly off | TAP 4 times exactly on the kicks, then loop again |
| The mix gallops ("ga- dump") | The kicks aren't lined up | Tap + Nudge or − Nudge until one clean thump (Lesson 6) |
| Matched, then drifts apart | The tempos are slightly different | Move PITCH half a percent in the direction you keep nudging |
| PITCH won't go far enough | It's limited to ±8% | Turn on WIDE for ±50% |
| Voice sounds chipmunky or slow | KEY is off, or 45 is lit | Turn KEY on; check the speed is 33⅓ |
| Scratching feels too fast to control | Platter is on normal or 1:1 vinyl | Click Platter until it says fine |
| The pull-back is heard in a forward | Fader: Blend, or the fader hand is late | Switch to Fader: Cut; close the fader just before you pull |
| The record jumps ahead after a scratch | SLIP is on (it keeps time underneath) | That's intended; turn SLIP off to stay where your hand left it |
| Muddy, boomy mix | Two basslines at once | KILL LOW on one deck (Lesson 8) |
| One deck is silent | Crossfader all the way to the other side, or its Volume is down | Check the crossfader and the deck's Volume |
| Everything sounds thin or muffled | A Filter or EQ was left on | Press FLAT on that deck |
| Recording stopped by itself | Takes are limited to 10 minutes | Start a new take |
| No Drum Bench beat in the strip | Nothing has been sent yet | On the Drum Bench, press TO THE DECKS |